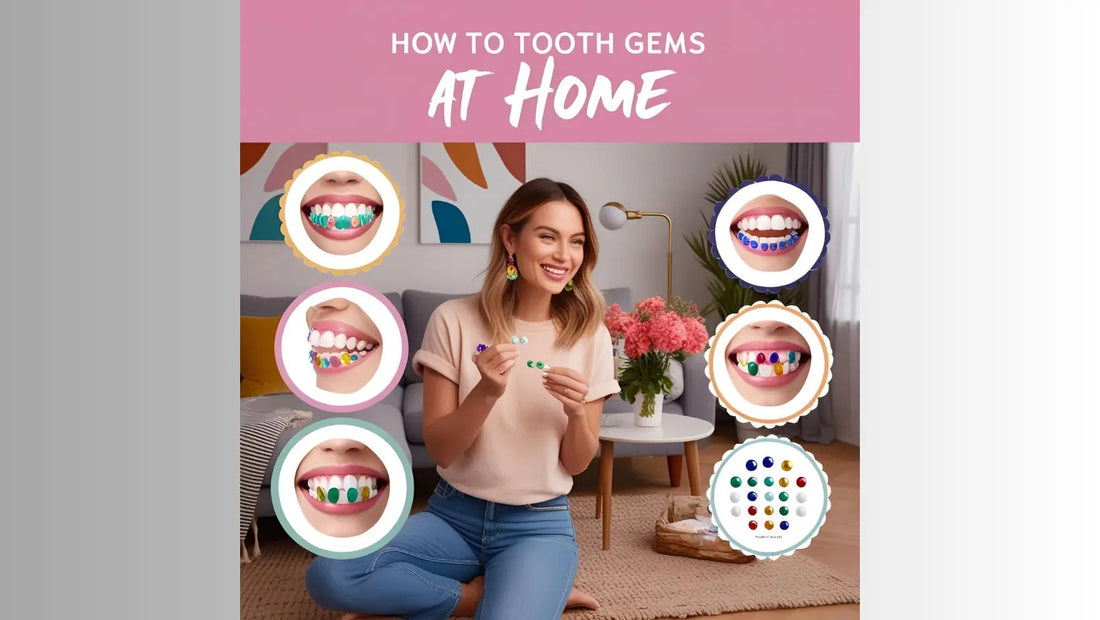
How to Do Tooth Gems: A Beginner’s Guide
Share
Tooth gems are an exciting and fashionable way to add a unique sparkle to your smile.
With their rise in popularity, especially among celebrities and influencers, more people are curious about how to do tooth gems themselves at home.
This comprehensive beginner's guide will walk you through how to do tooth gems and everything you need to know, from preparation and application to aftercare and safety tips.
Whether you want a subtle crystal or a flashy design, understanding the process is essential for a safe and stunning result.
Read More: Tooth Gems Adhesive
What You Need Before You Start Tooth Gems at Home
Before attempting how to do tooth gem, preparation is key.
Here is a detailed list of what you need:
- Tooth Gems: These are small decorative pieces made from crystals, rhinestones, gold, or diamonds. They come in various sizes and shapes and are specifically designed for dental use.
- Dental Adhesive or Bonding Agent: It is crucial to use a dental-grade adhesive to ensure safety and durability. Never use nail glue, super glue, or any household adhesives, as they can damage your enamel and cause infections.
- UV Light (Curing Lamp): A UV curing lamp is necessary to harden and secure the adhesive to your tooth. Make sure it's compatible with dental adhesives.
- Etching Gel: This is used to roughen the surface of the tooth slightly, allowing better bonding of the adhesive. Use only dental-approved etching gels.
- Cotton Rolls and Dental Bib: These help keep the tooth area dry and clean during the application.
- Wax Pen and Applicators: For handling the tiny gem and placing it precisely.
- Gloves and Mask: To maintain hygiene and avoid contamination.
- Mirror and Good Lighting: Proper visibility is important for accurate placement.
- Disinfectant Wipes and Hand Sanitizer: To sanitize your tools and workspace.
Step-by-Step Instructions on How to Do Tooth Gems Safely
Applying a tooth gem at home requires patience, cleanliness, and attention to detail. Follow these steps to apply a tooth gem safely:
- Prepare Your Workspace: Disinfect your tools, wear gloves and a face mask, and set up your materials on a clean surface.
- Dry the Tooth Surface: Use cotton rolls or dental gauze to keep the tooth dry. Moisture can prevent the adhesive from sticking properly.
- Apply Etching Gel: Place a small amount on the area where the gem will be applied. Let it sit for about 15–20 seconds, then rinse thoroughly and dry the tooth again.
- Apply Bonding Agent: Use a tiny brush or applicator to apply dental adhesive to the prepared tooth surface.
- Place the Gem: Using a wax pen, pick up the gem and gently press it onto the adhesive. Hold it in place for a few seconds.
- Cure with UV Light: Shine the UV lamp over the tooth gem for 20–60 seconds, depending on the adhesive instructions.
- Final Check: Ensure the gem is firmly attached. Do not eat or drink for at least one hour afterward to allow the adhesive to set fully.
- Clean Up: Dispose of used materials properly and sanitize your tools.
Tips to Make Tooth Gems Last Longer
Proper care and maintenance can make your tooth gems last for weeks or even months. Follow these tips to extend the life of your gem:
- Avoid Hard and Sticky Foods: Chewing on hard candies or sticky snacks can loosen or dislodge the gem.
- Use a Soft-Bristled Toothbrush: Gentle brushing helps protect the adhesive and the gem.
- Don’t Pick or Touch the Gem: Constant touching can weaken the bond or shift the gem's position.
- Stay Away from Whitening Products: Many teeth whitening products contain chemicals that can degrade dental adhesives.
- Regular Oral Hygiene: Brush and floss daily, being careful around the gem.
- Avoid Smoking and Alcohol Initially: These substances can interfere with adhesive bonding if consumed too soon after application.
By treating your tooth gem like a piece of dental jewelry, you ensure it remains a beautiful part of your smile for as long as possible.
Common Mistakes to Avoid When Doing Tooth Gems
When applying tooth gems, beginners often make mistakes that can lead to discomfort, dental issues, or failure of the gem to stay in place. Here are the most common pitfalls and how to avoid them:
- Using Unsafe Glue: One of the most dangerous mistakes is using household glue. These adhesives are not designed for oral use and can damage tooth enamel or cause infections.
- Skipping the Etching Step: Etching is essential for the adhesive to bond well with the tooth. Skipping this step may cause the gem to fall off quickly.
- Improper Tooth Drying: Even a small amount of moisture can prevent proper adhesion. Always dry the tooth thoroughly.
- Placing the Gem Too Close to the Gum Line: This can irritate the gums or make flossing difficult.
- Not Curing Long Enough with UV Light: Insufficient curing time can weaken the bond. Always follow the adhesive manufacturer’s instructions.
- Neglecting Hygiene: Working in an unclean environment or using unsterilized tools can introduce bacteria to the mouth.
Avoiding these mistakes ensures not only better results but also the long-term safety of your dental health.
DIY vs. Professional: The Best Way to Do Tooth Gems
Tooth gems can be applied either at home (DIY) or by a licensed dental professional. Each method has its advantages and disadvantages. Let’s break them down:
DIY Application
- Pros:
- Cheaper than professional services
- Convenient and can be done at home
- Great for experimenting with looks
- Cons:
- Higher risk of improper application
- May lack quality tools and adhesive
- Shorter lifespan of the gem
- No expert supervision
Professional Application
- Pros:
- Applied by trained experts using dental-grade materials
- Safer for your teeth and gums
- Longer-lasting results
- Personalized consultation and aftercare guidance
- Cons:
- More expensive than DIY
- Requires scheduling and visiting a clinic
If you are new to tooth gems, starting with a professional application is advisable.
Once you become familiar with the process and safety standards, consider applying them at home.
Aftercare Advice for Tooth Gems
Aftercare is just as important as the application itself.
Taking proper care of your tooth gem can help maintain its appearance and protect your dental health.
- Avoid eating or drinking for 1 Hour After Application: This gives the adhesive time to cure fully.
- Brush Gently Around the Gem: Use a soft-bristled toothbrush and avoid direct scrubbing on the gem for the first 24 hours.
- Don’t Use Whitening Strips or Gels: These can loosen the adhesive.
- Monitor the Gem: Check regularly to ensure the gem is secure and hasn’t shifted.
- See Your Dentist Regularly: Keep up with your dental check-ups to ensure there are no adverse effects.
- Avoid Playing with the Gem: Using your tongue or fingers to touch it can loosen the bond.
- Avoid Hard Foods for the First Few Days: This helps prevent accidental detachment.
Are Tooth Gems Safe? What Dentists Say
Tooth gems are generally safe when applied correctly and using appropriate materials. Dentists typically do not object to them as long as certain conditions are met:
- Proper Hygiene Is Maintained: Brushing and flossing should be continued as normal, taking care around the gem.
- Non-Invasive Nature: Tooth gems don’t require drilling or removal of tooth structure, which makes them a safer cosmetic procedure.
- Temporary: The gem can be removed at any time without permanent damage.
However, dentists do express concern over:
- DIY Applications Gone Wrong: Use of improper materials or skipping critical steps can result in enamel erosion, cavities, or infections.
- Extended Wear Without Monitoring: Not getting your teeth checked regularly can lead to unnoticed issues developing under or around the gem.
If you plan on wearing tooth gems long-term, it’s best to coordinate with your dentist to make sure your oral health isn’t compromised.
How to Remove Tooth Gems Without Damaging Your Teeth
Eventually, you might want to remove your tooth gem. Doing this correctly is vital to avoid damaging your teeth. Here are your options:
- Professional Removal: This is the safest and most effective method. A dentist will use dental tools to remove the gem and any adhesive, followed by polishing the tooth.
- Debonding Agents: These are chemical solutions that soften the dental adhesive. If you’re experienced, you might use these to safely remove the gem yourself.
- Polishing the Tooth: After removal, it’s important to polish the tooth surface to remove any residual adhesive.
- Use of Fluoride Products: After removal, using a fluoride toothpaste or treatment can help re-mineralize any enamel that may have been affected.
- Avoid Picking or Force Removal: Never try to pry the gem off. This can crack your enamel or even cause a piece of your tooth to chip off.
Final Thoughts on How to Do Tooth Gems the Right Way
Tooth gems are an expressive, customizable, and fun way to add some sparkle to your smile. When done properly, they are safe, temporary, and easy to manage.
Whether you choose to go the DIY route or seek professional help, understanding the process and following proper guidelines will help ensure success.
Take the time to prepare, apply, and care for your tooth gem properly. Avoid common mistakes, and always prioritize hygiene and safety. Remember, your smile is precious—adorn it with confidence and care!